
I organized a Project Fugu hackathon
A month ago, I organized (with a colleague of mine, Gérôme Grignon) a Hackathon based on the Project Fugu “Shape Detection API”.
TLDR;
The shape detection api is very easy web API to use but it has lots of limitations according to the platform you have. If you are curious about what we done, you can read this article 😇.
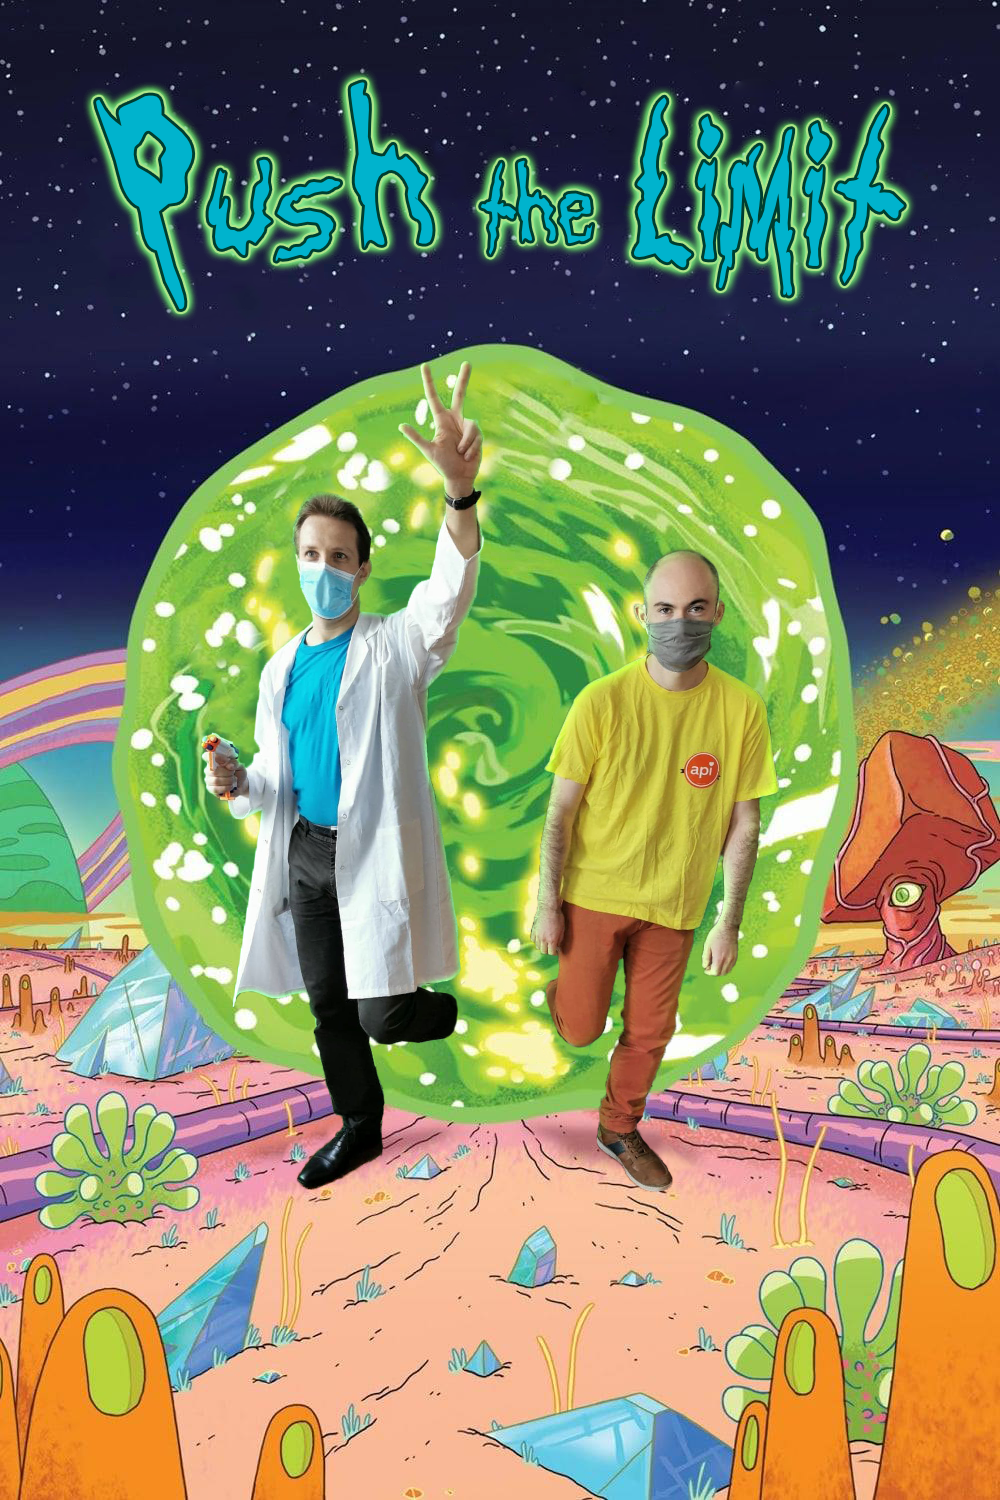
Push the limit
As you can imagine, we wanted to create a fun Hackathon, a hackthon where the fun and the creativity were more important than the social impact of the result 😅.
The main idea of this hackathon was to play with the Shape Detection API.
TLDR; This API lets you find your shapes in images. The shape is restricted by the web platform, you could recognize a face, a barcode or some text (not implemented yet)
Under the hood
This API is interesting because with very few lines of codes you have something that gives you the position of shapes detected in an ImageBitmapSource. An image is nice, but a canvas is better 😉. Indeed, a canvas can generate data that the detector could interpret.
Here is for example how you can detect a face:
const faceDetector = new FaceDetector({ |
The object face returned is an array with all positions of the detected faces in the image or canvas.
Here is the result of face detection:
[ |
Here is the result of barcode detection:
[ |
For the moment, the TextDetector is not yet universally available 😅.
Some Helpers for particpants
Even if the API is really easy to use, combine it to video, canvas, a performant mechanism is a synonym of lots of boilerplate. Indeed, when you want to play with the camera, you need to follow those steps to be sure to not block the UI thread.
- Start the camera with the correct parameters
- Inject the stream to an HTML
videoelement (and keep a copy somewhere) - Start to play with
requestAnimationFrameto be sure to optimize the rendering. - On each frame, draw the video on your canvas
- Start a detection in asynchronous mode (the result will arrive in another frame)
- If a result of detection is present, then you can draw something
Each of those steps has specific code and it could be lots of code for just detection and drawing something 😅. That’s why we create some helpers that you could use too if you want for your projects.
Detector.js
This file wraps and exposes methods to detect things on the image
class Detector { |
The source code is available here Gist Detector
UserMedia.js
UserMedia is the API used to request camera input. We create this class :
class UserMediaHelper { |
The source code is available here Gist usermedia
As you can see, the UserMedia helper uses a detector.
The Helper provides also a method to stop your camera in the right way 😎.
CodeSandBox
To continue helping attendees, we created a codesandbox sample to clone so that attendees could start directly. Here is the result of the codesandbox.
To be sure that it works with your configuration, check if you have enabled the flags.
- Demo: Pickle Rick Me
- CodeSandBox to clone: CodeSandBox Push The Limit
Demos writen
Here is the list of demos people write :)
- Face Face Revolution (a dance dance revolution but with your face): https://codesandbox.io/s/z3opl
- Draw a pickle rick if a barcode is found (android only): https://codesandbox.io/s/891md
- Like Pickel Rick but with a random character of smash ultimate game: https://codesandbox.io/s/festive-wiles-f9hbs?file=/src/index.js
- Draw a “joker” smile and if you open your mouth show a grumpycat (only specifics version, see bugs and restrictions after): https://codesandbox.io/s/elegant-mayer-up20v
- A Game where a Pickle Rick have to eat pickle coming from the top of the screen: https://codesandbox.io/s/young-flower-s0162
Special Trick for image
During the preparation of this hackathon, we faced a problem with the pickle image and the drawing of the pickle on the canvas. Indeed, I didn’t know it before but Canvas is also sensible to CORS origin security when you draw an image!
To understand that, you have to understand that codesandbox doesn’t host the image in the same origin of your page. The resource is redirected under the hood to a bucket S3. To bypass this problem, we simply write a script that downloads the image from the amazon server, extracts the data, converts them to base64 and injects this base64 data as the source to the original img. In that way, you can continue to draw images on canvas without facing any CORS problem 🥳
export function prepareImage(img) { |
What we learn
During this session, we have different kinds of developers and environment so here is the conclusion as of ‘Oct 2020’.
Please have in mind that Shape Detection API is still an experimental API, so the conclusion what I will write now could be not the same as what you see when you will read this post.
FaceDetector
Face detection works well but not everywhere. Indeed, we couldn’t make it work on those platform:
- Chrome Android (it’s a bug bc1107675) When this article is written, a fix has been deployed and should be shipped with chrome 88
- Chrome Linux (it has never worked Overview api)
- Chrome Mac -> The landmarks aren’t well positioned (it’s a bug too bc914348)
Fun fact, the face recognition is based on eyes position, it is a COVID proof API 😷😅.
If you wear glasses but big glasses, the recognition could be very lacky.

Indeed Gérôme as you can see wear big glasses. When he wears them, face recognition wasn’t very smooth, my Pickle Rick move with visible steps. But when he removes its glasses, the Pickle Rick follow its face.
The bug of Landmarks could be for the moment bypass by using fast mode. This bug is platform dependent. Here are the results according to the platform I could test:
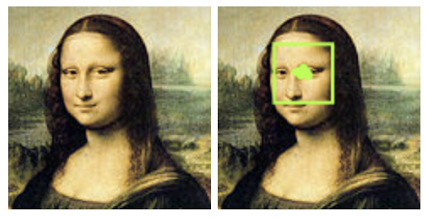
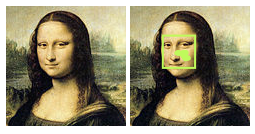
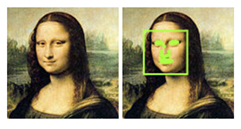
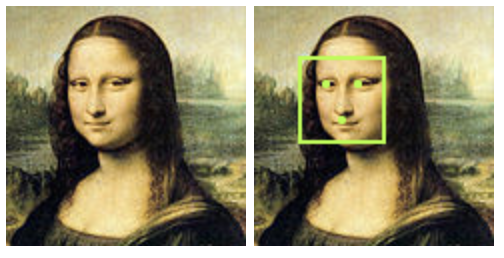
You could test this at this url : https://mona-lisa.glitch.me/ or https://mona-lisa.glitch.me/?fast
BarCodeDetector
The BarCodeDetector which was working previously on Android and Desktop is just working on Android for devices with the Google Play Services. It’s a limitation for the moment but we could hope that tomorrow, something based on non “native” solution will arrive:
This API is part of the new capabilities project. Barcode detection has launched in Chrome 83 on certified devices with Google Play Services installed. Face and text detection are available behind a flag. This post will be updated as the Shape Detection API evolves
But it works in those conditions 🤗
TextDetector
This feature isn’t yet implemented in the tested devices so no-one could test it. And Google is also alerting that it’s not universally available.
Credits
Thank you to François Beaufort who helped me debug and explore some of those APIs after the Hackathon and who reviewed this article.
Thank you also to Gérôme Grignon who helped me to lead this workshop.
